


Kaizaia project || Scottsdale, Arizona
dining table
DIY fluted
Painting a table with a faux marble finish is a great way to give an old, tired piece of furniture a new lease of life. Not only is it a fun project to take on, but it's also a cost-effective way to transform your home decor without breaking the bank.One of my childhood friends recently bought a new home for her growing family. (Literally, the first time we did the walk through there were two children, by the time they finished unpacking there were three). We've taken art classes together since we were in the 3rd grade and she knew I would be up for repurposing an old garage sale table into something new. It needed to be contemporary, chic, kid proof, AND done in less than 4 days? Challenge accepted.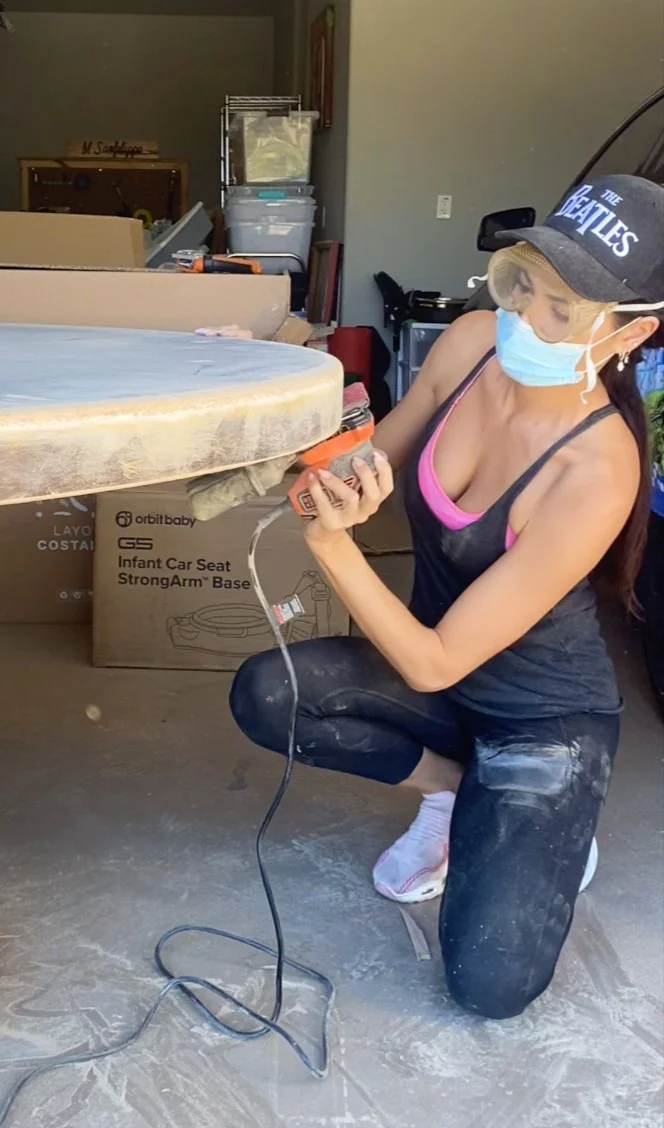
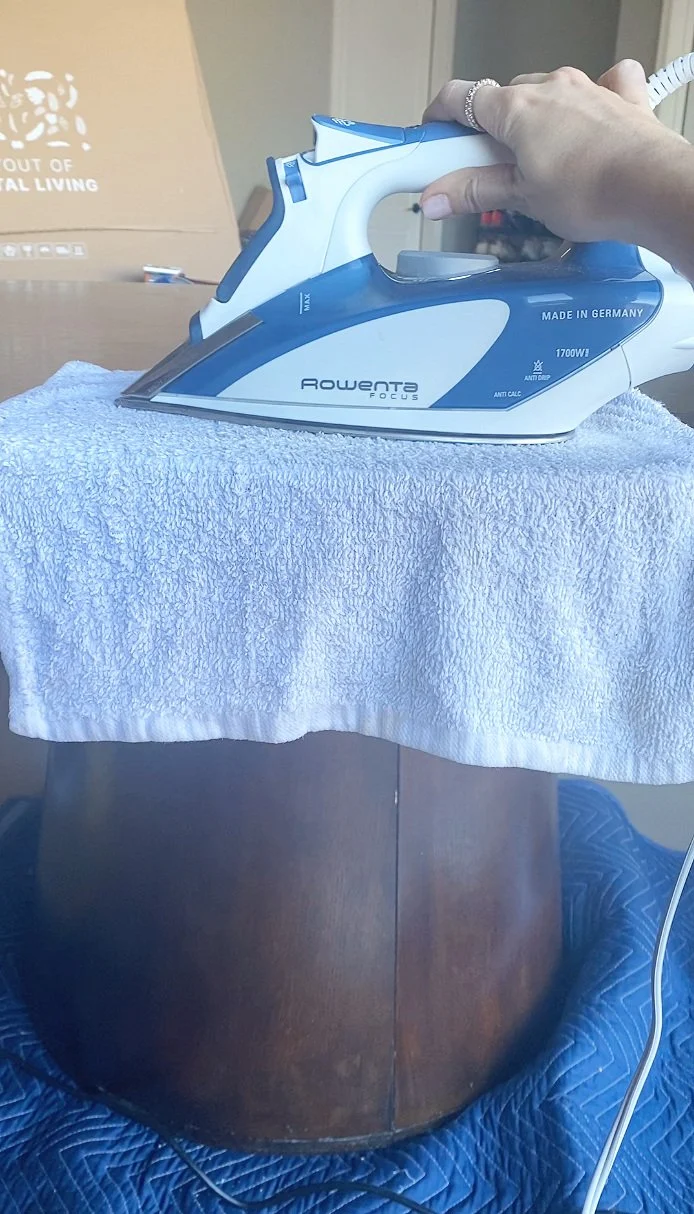
The original table was dark wood and from the photos she sent me, I don't even know if it's solid wood, a wood veneer, or just a painted particle board. My stepdad is magic when it comes to woodworking so I'm hoping it's a solid wood table that I can sand down and refinish but I'll find out when I see it in person. She wants this table done for her first ever party in the new house which gives me less than 4 days to figure it out. Seeing it in person I can already tell its not a solid wood table. Boo. The next plan of attack is to take off what I hope is a wood veneer. A veneer is a thin layer of wood that protects the wood underneath like a giant aesthetic sticker.DIY tip: Using a damp cloth and a steamer/iron will loosen the glue enough to be able to peel off a wood veneer
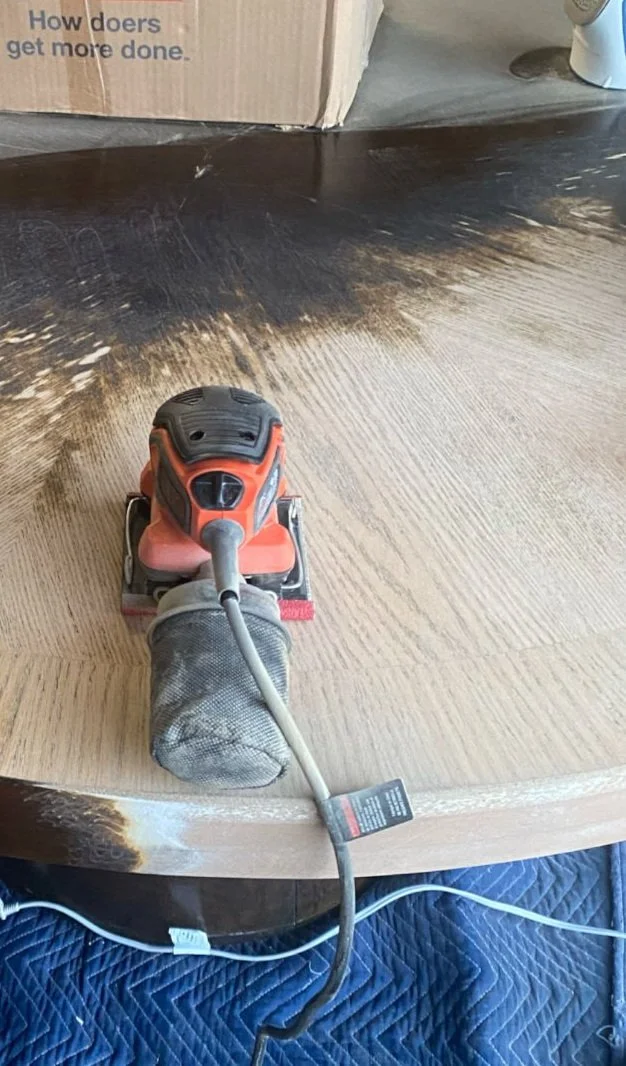

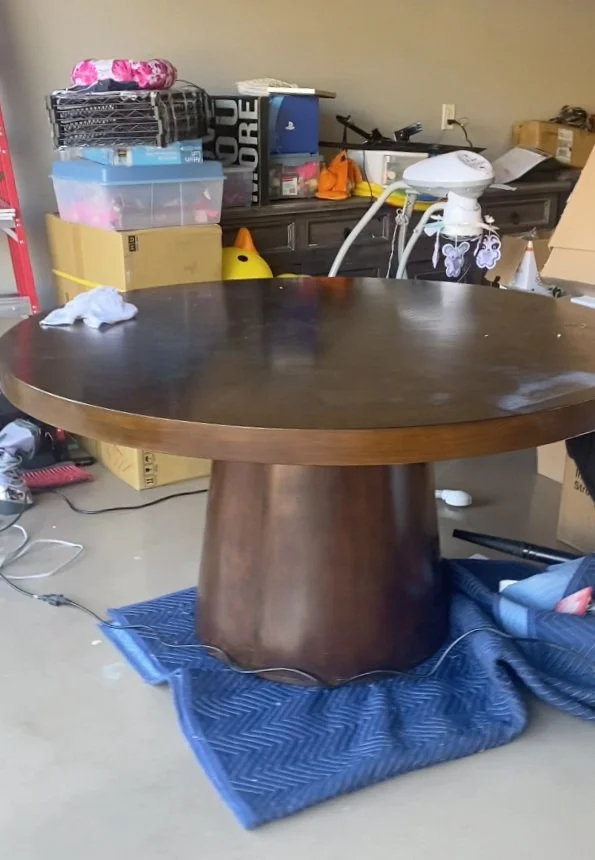
Well I tried this technique to steam off the veneer, but sadly its not veneer either. It's just thick layers of sealant and dark paint over particle board. So, onto Plan B: Time to sand her down! I took off a good chunk of the paint and we didn't HATE what was underneath, but it definitely didn't "wow" us enough to stain it, so.... We prep for Plan C: time to paint! I gave her a quick cleaning before I wrapped a veneer strip that I thought we would use as the gold trim, but we ended up finding something WAY cooler in the end, so if you’re trying this at home, skip this.I measured my base height leaving room for the trim at the bottom, and cut up one of my 8ft. long wood pieces. I love that it’s flat on the back. It took about 13 of these total. I used Gorilla brand wood glue and a 1” wood chunk I cut myself to space them out evenly. Now that I have this system down it's time to cut the other 12 pieces.Trying to decide on a design for the table, we took a look at the moodboards and renderings I had made for the rest of the house. I thought she might like this two tone fluted look that's popping up everywhere - CB2 in particular. I know she loves their look and I've been dying to try and DIY a fluted look on ... well, literally anything. So we decided on a black base, faux marble top and a gold trim. fluted base


DIY tip: Bring your measurements to Lowes, they WILL cut your wood for you.
After that it was just sand, glue, sand, glue… I did about 5 at a time. I learned it's kind of like putting on eyelashes.. You want the glue a little tacky or they're going to slip right off.
After the glue is dry, FINALLY it’s time for paint. I put on a light coat of spray paint primer because I was a little worried this light weight wood might warp under a layer of heavy interior paint. Then I finished it with the same color paint that they used for their cabinets to give it a custom look.
While it's drying, we can move onto the faux marble top.
The color that I chose first turned out to be way too white. When we brought it into the kitchen, it looked so bright compared to their marble countertops. In retrospect, I would have picked a shade like “Whitetail” by Sherwin Williams. Roll on at least 2 coats of paint before adding the veins. faux marble top
What I REALLY wanted to try that looked super easy was this spray marble effect that looks kind of like Silly String. It's not sold in stores near me, and even amazon couldn’t get it to me in time for this party she’s hosting. So, I had to do it the old fashioned way- use a thin paint brush and a spray bottle.
DIY tip: For faux marble choose a warm shade of white
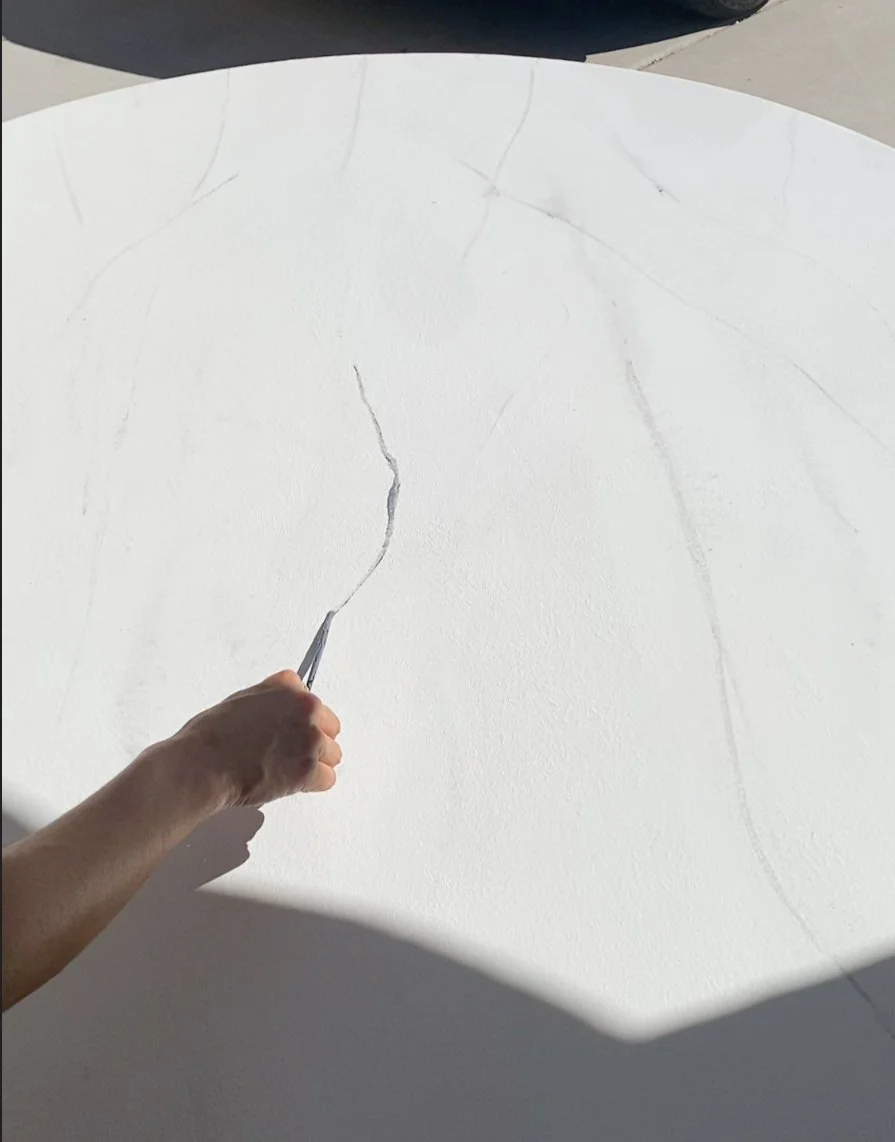
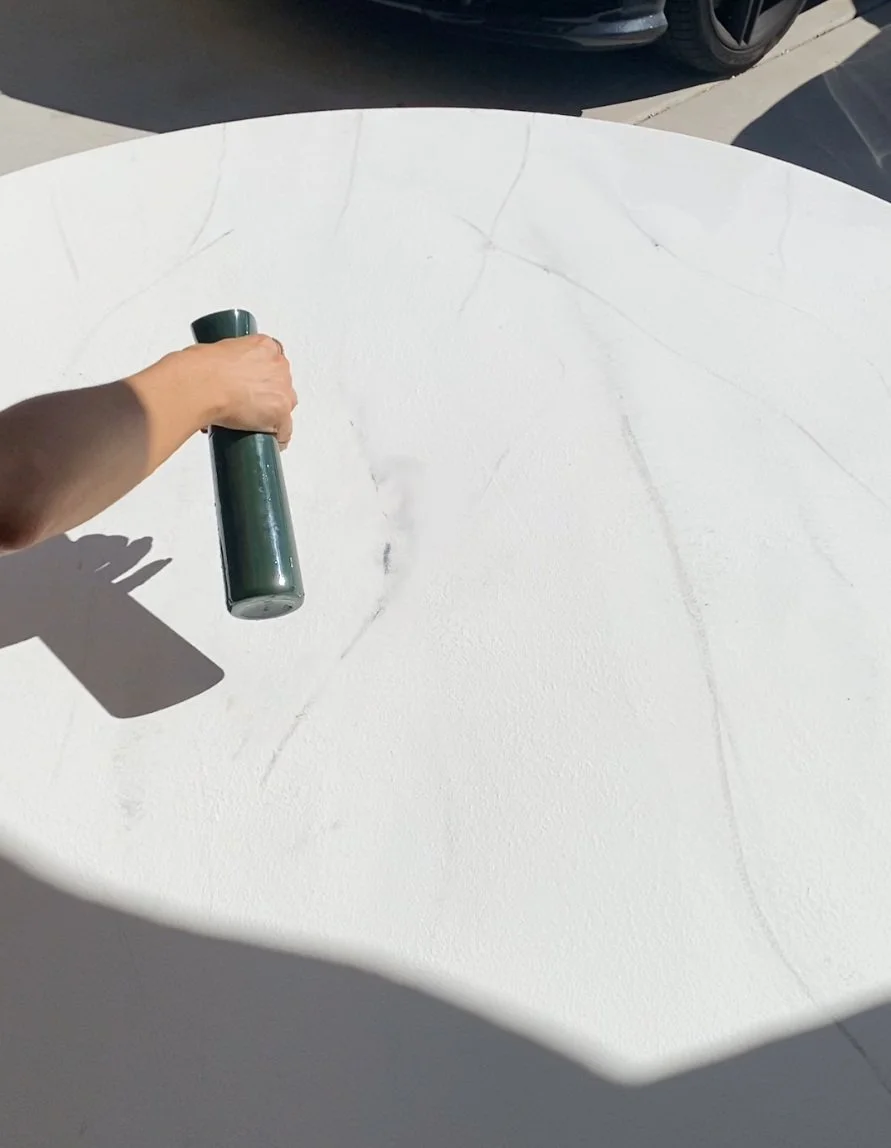
Draw very thin veins with black paint and then spray with water to soften the edges. For any veins that look too dark, use a sponge dipped in the white paint and gently dab over to mute the color. Sponging also adds a nice texture to the stone-look. For another make-up analogy: it's like a buildable foundation. You can customize how much coverage you want in different areas. I left it really sheer over the lines I really liked and layered over the heavy ones that just looked fake. This technique gave it depth and layers like a true stone.Bonus: an edible spray found in the cake decorating section gave the marble a beautiful shimmer.

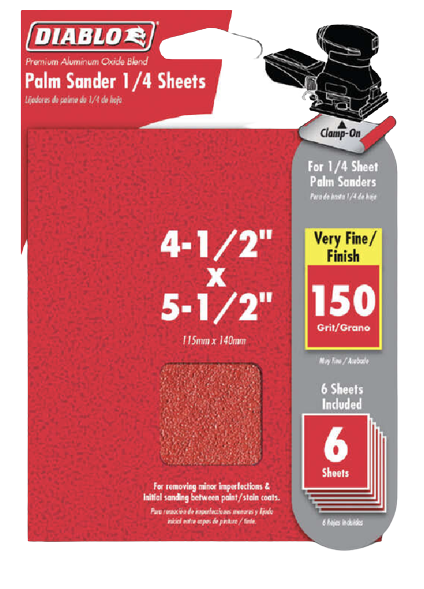
It was really important to make this table super kid-friendly and durable. I chose a pour-on epoxy that would withstand the busy lives of a family of five. Most epoxy has a high-gloss finish which I wasn't crazy about. So the last step for the top was to give it a light sanding to slightly dull the finish. A very fine 150 grit sand paper was just enough to give it a natural matte look. For the bottom trim, we used a rubber strip that's used for weather stripping and can definitely hold up to chair legs, vacuums and little people feet running into it. I sprayed it with Gold Leaf paint, used the easy peel and stick but also reinforced with a little hot glue. Trim and Sealer
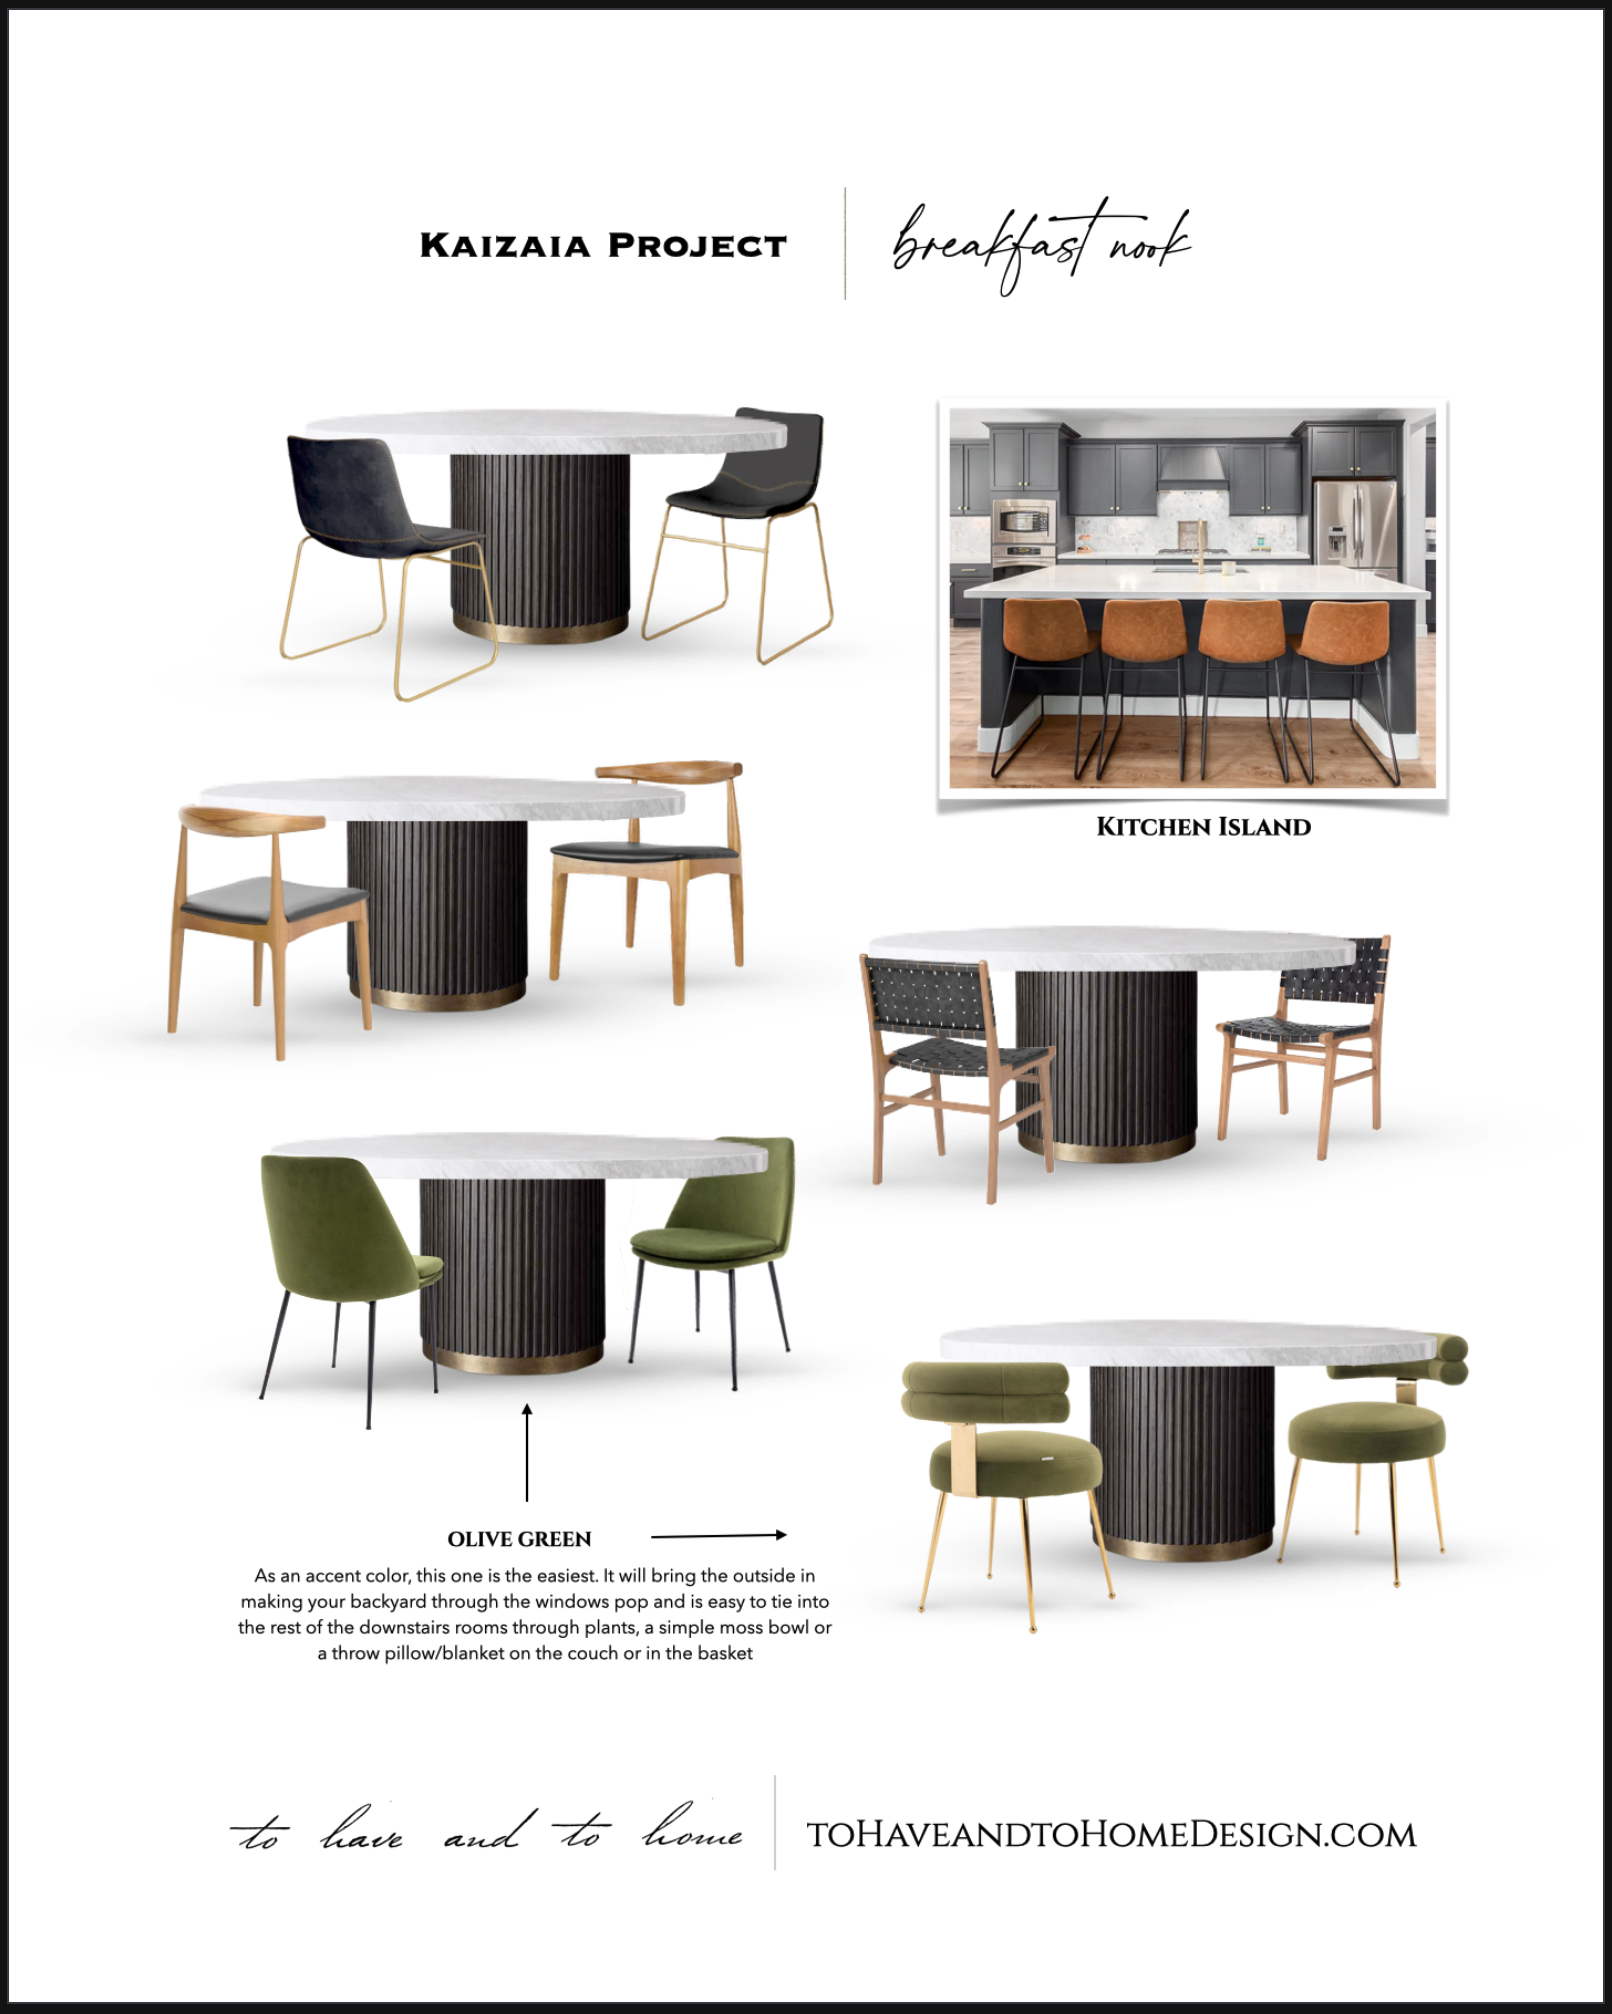
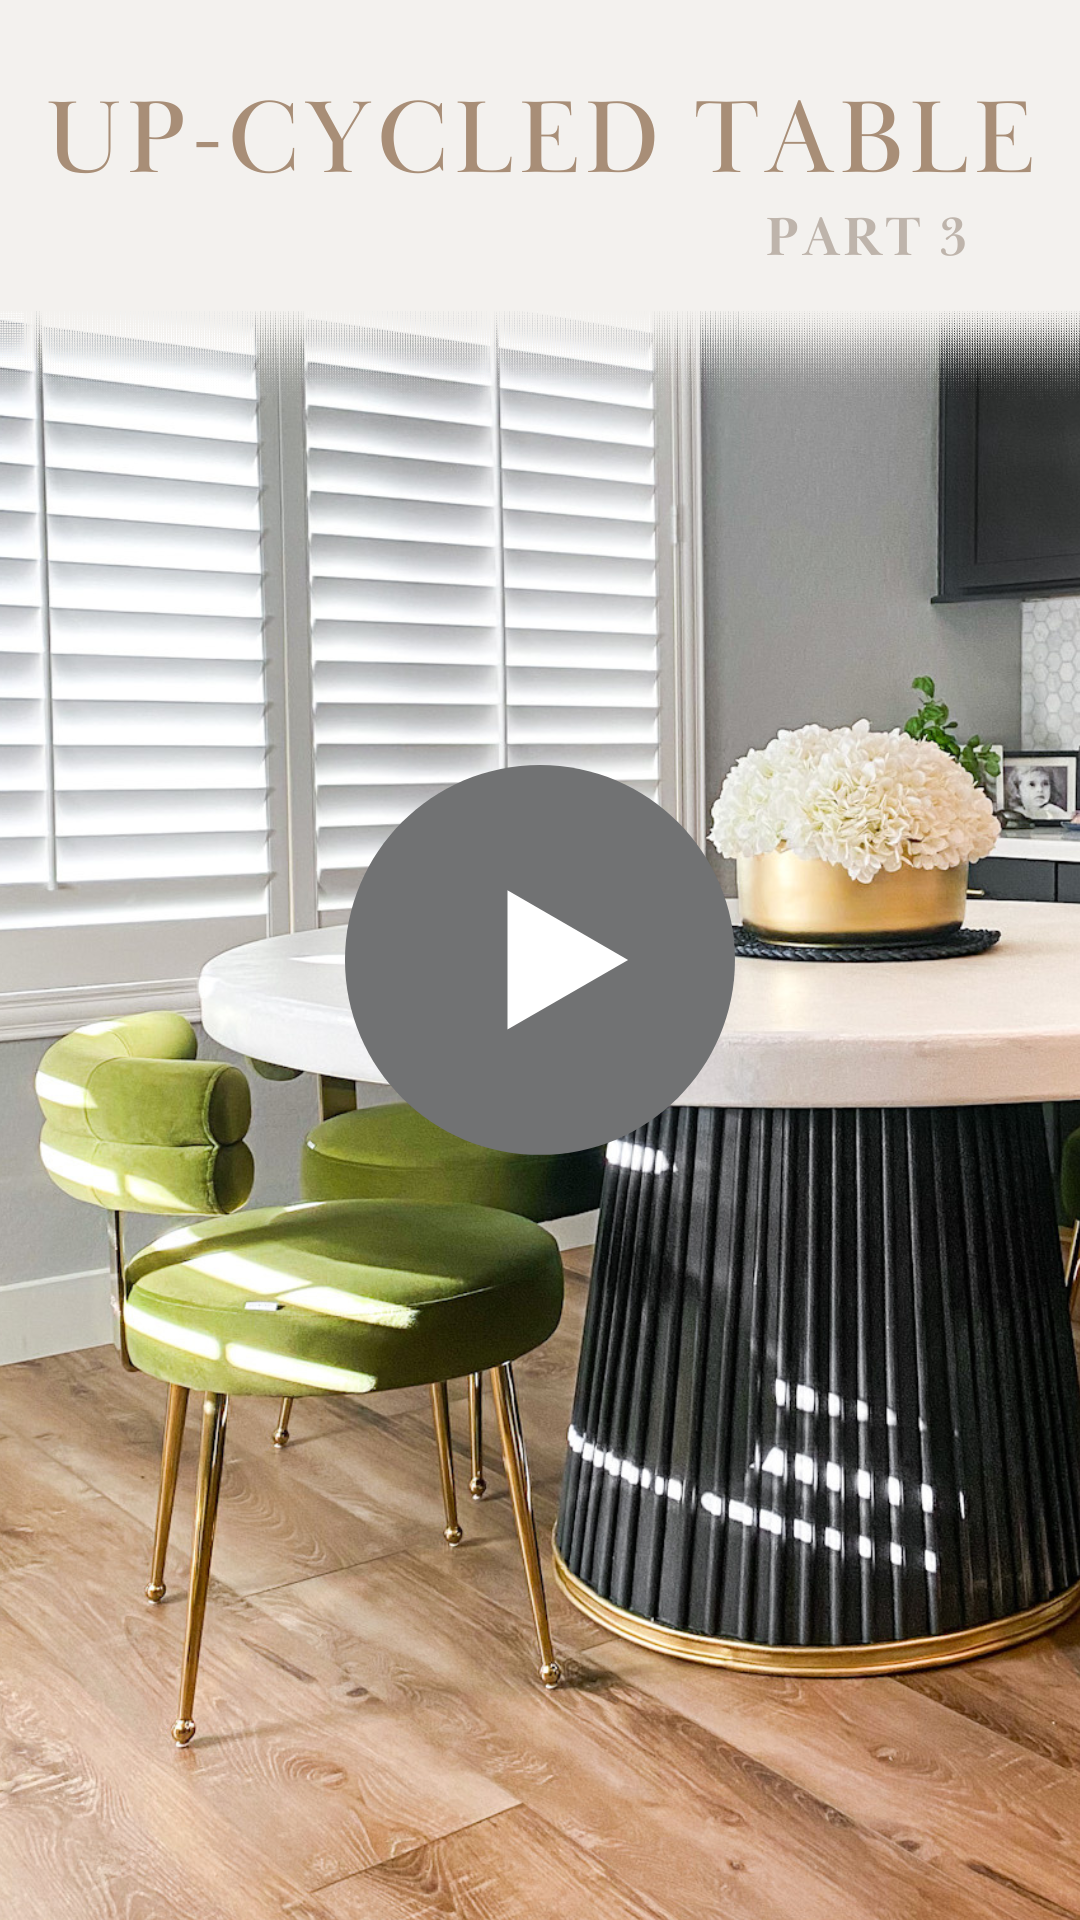
I gave my friend some options for dining chairs in the moodboard, and secretly hoped that she would choose the green velvet and gold chairs... and she did! Most of my clients that don't love a lot of color, will embrace GREEN. GREEN is what I often refer to as the non-color, color. Adding green is like bringing the outdoors inside. It often coordinates with the natural landscape that your eyes see outside the window and its easy to make a cohesive palette throughout your home with indoor plants, a simple moss bowl, or a throw pillow/blanket on the couch or in a basket. Stay tuned for my next posts about all of my favorite ways to use my favorite non-color, color!style the room
Check out my video series below on how I made the table and Follow my Instagram for more DIYs!


Get The look


*Products linked are either the pieces used for this project or my recommended alternatives. Some may be affiliate links from which I earn a small commission.Green velvet dining chairs
Gold chandelier


Faux White Peonies
Gold Vase

Gold salt & Pepper shakers

DIY The look
half round wood Molding


Gorilla Glue
Gold Leaf spray paint

hand saw & Mitre Box

Marble Effect Spray
paint primer

Sherwin Williams paint
fine sand paper
pour on epoxy


rubber seal


pearl shimmer spray
Rowenta Steam Iron